MeshSkinner (for Unity 3D)
What is it?
The MeshSkinner class provides an easy way to skin a mesh during runtime in a game made in the Unity 3D engine.
- Provide a GameObject containing a mesh (or several) and another GameObject containing the skeleton hierarchy.
- MeshSkinner will put them together for you.
- The result is a model with fully working SkinnedMeshRenderer component(s) structured like any other model imported by the Unity Editor.
This tool goes great together with the BvhImporterExporter tool!
Usage
Using the MeshSkinner class is simple. You do it through code, not via a MonoBehaviour component in the Unity Editor. Here's a C# example:
using Winterdust;
[...]
GameObject modelGO = GameObject.Find("My_Model");
GameObject skeletonGO = GameObject.Find("My_Skeleton_Container");
MeshSkinner ms = new MeshSkinner(modelGO, skeletonGO);
ms.work();
ms.finish();
First I reference the model GameObject, it has one or more MeshFilter component(s) in itself or any of its children. Then I reference the skeleton GameObject, it has a bunch of empty GameObjects that act as joints and together define the skeleton bone hierarcy.
Before calling the MeshSkinner constructor the skeleton needs to be aligned to the model in world space. Simply position the GameObjects inside the mesh where the joints should be. You can change position/rotation/localScale of the skeletonGO via code (or align them in the Editor).
When the MeshSkinner instance is created the model gets prepared for skinning. The skeleton becomes a child of the model and any SkinnedMeshRenderer components are created. If any existing SkinnedMeshRenderer components are found they will be reused/reskinned.
The work() call is where the magic happens, it can be a pretty heavy call.
Finally the work gets applied to the the model in finish(). Now you can move/animate the skeleton and the mesh will follow!
The example can actually be written as just one line of code, the MeshSkinner instance is returned by most methods for easy chaining of calls.
Multi-threading
Unity is mostly single-threaded (with added "coroutine" thread-imitation where yield and IEnumerator is used) but work() actually supports being called from a real alternative thread. The constructor and finish() must be called from Unity's main thread due to limits imposed by the Unity Engine but it's possible to put all the actual heavy work on a different loading thread.
So a multi-threaded setup of MeshSkinner would look like this:
- Prepare all MeshSkinner instances on Unity's main thread.
- Call work() on these instances from a different thread (or several threads).
- Call finish() on these instances from Unity's main thread.
Speed
How long it takes to skin a mesh depends on how many vertices it has, the number of bones in the skeleton and of course how good the CPU is.
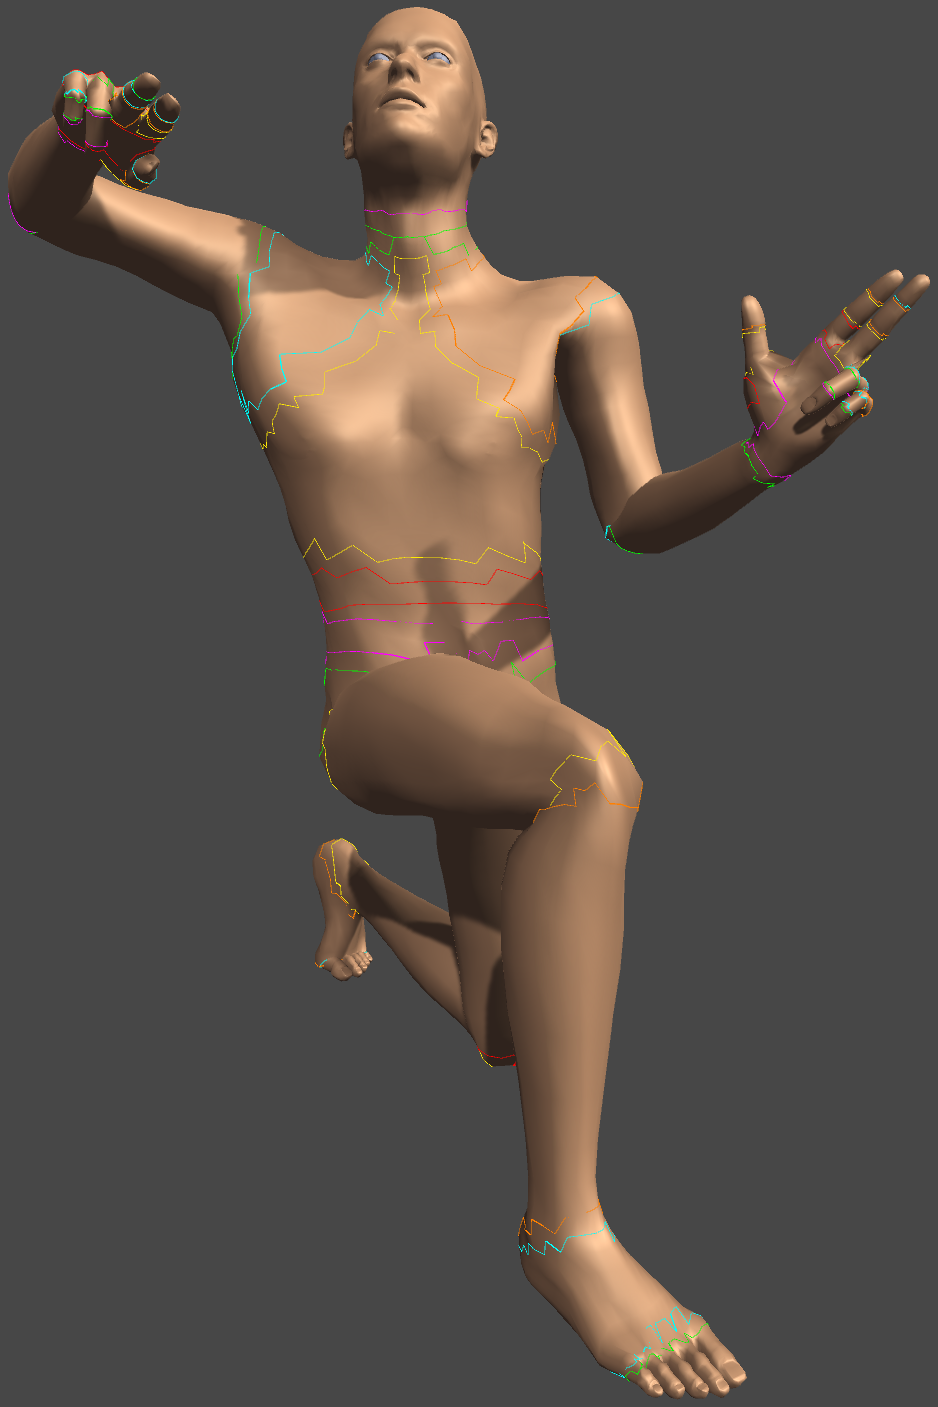
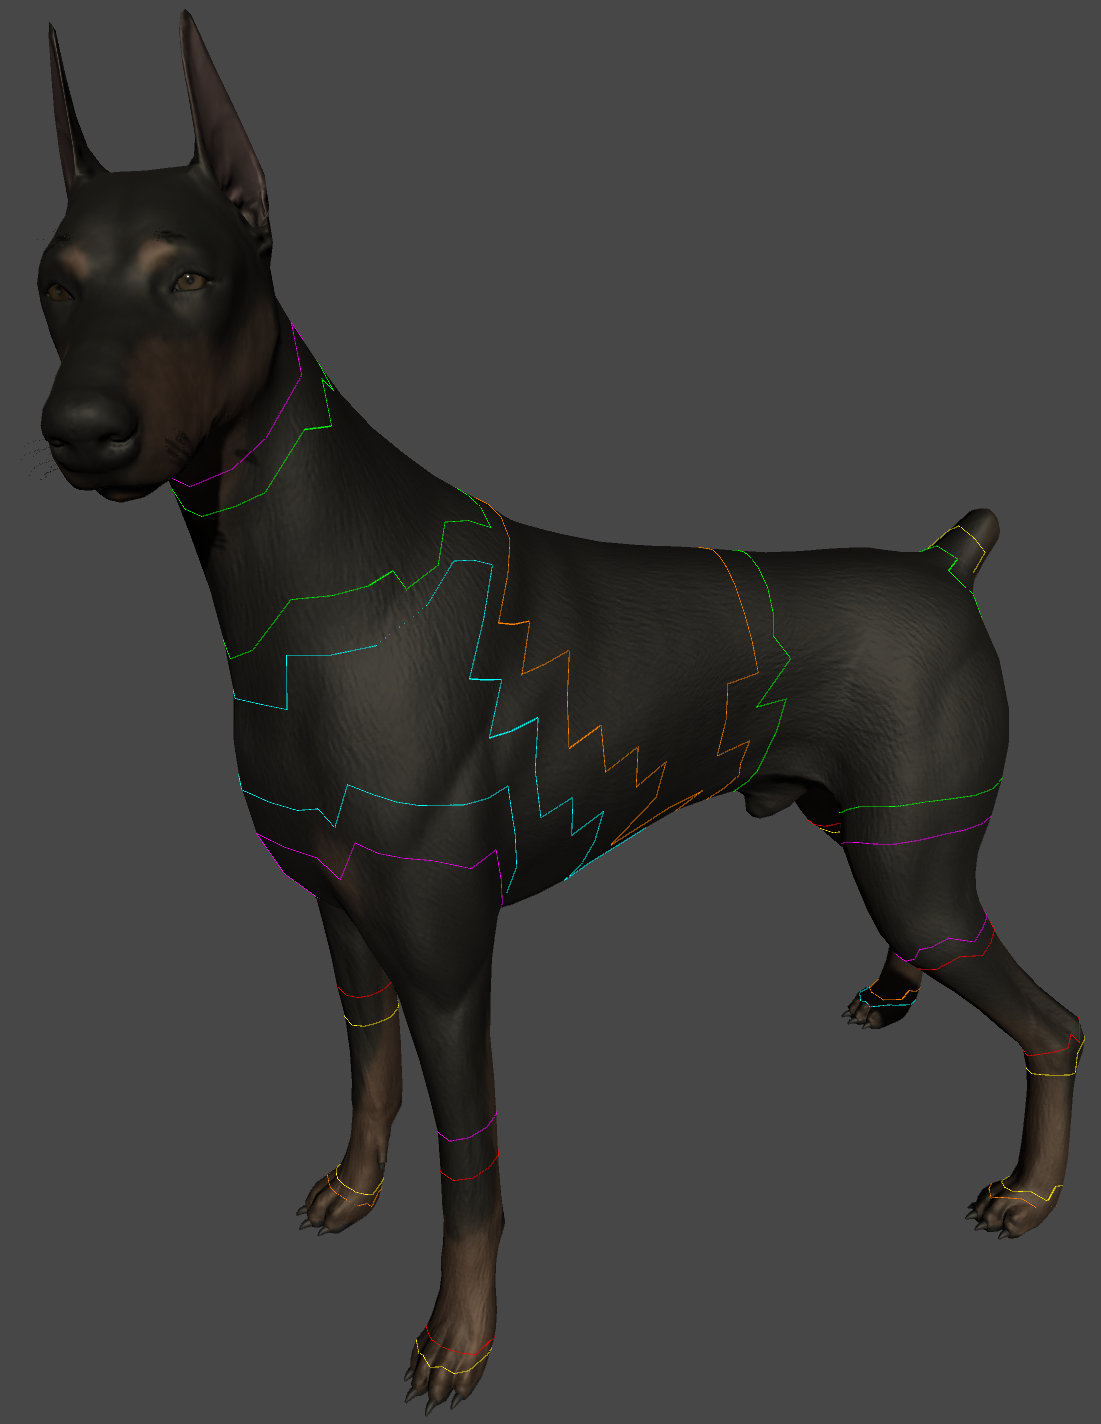
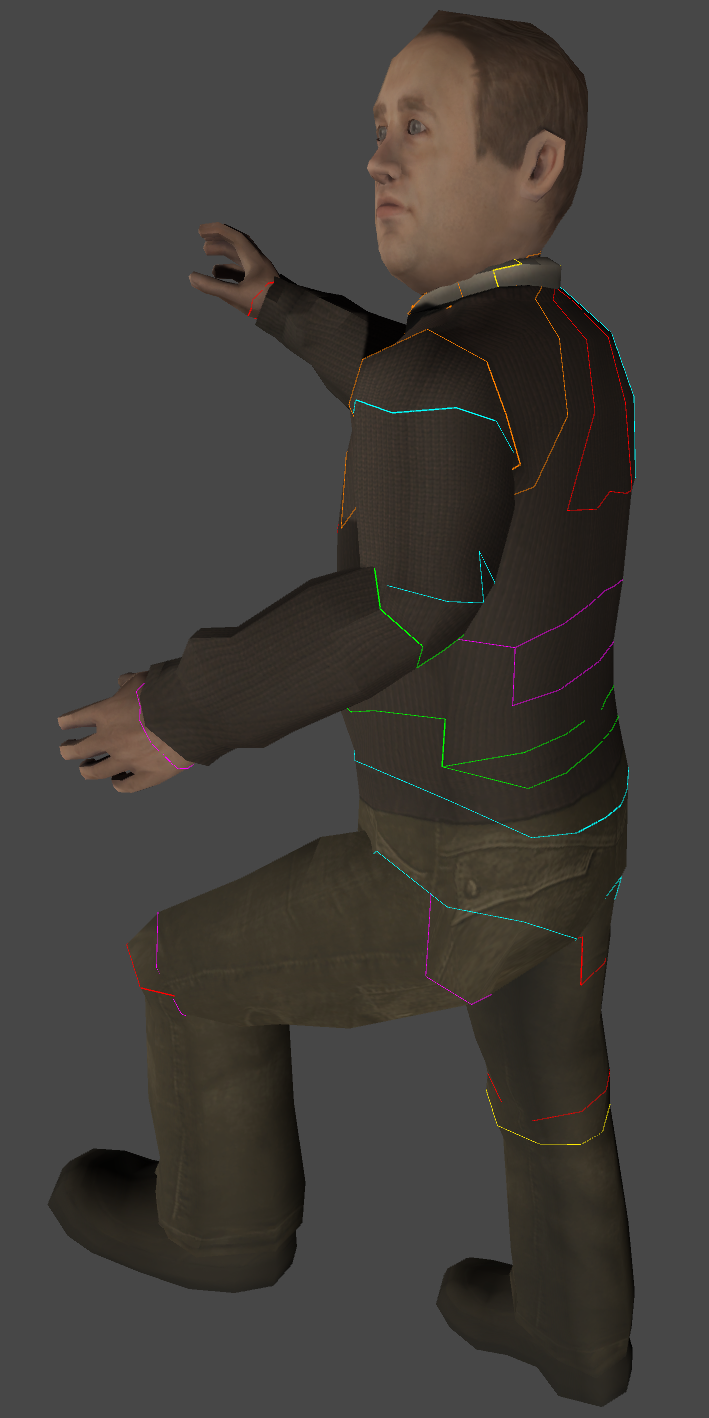
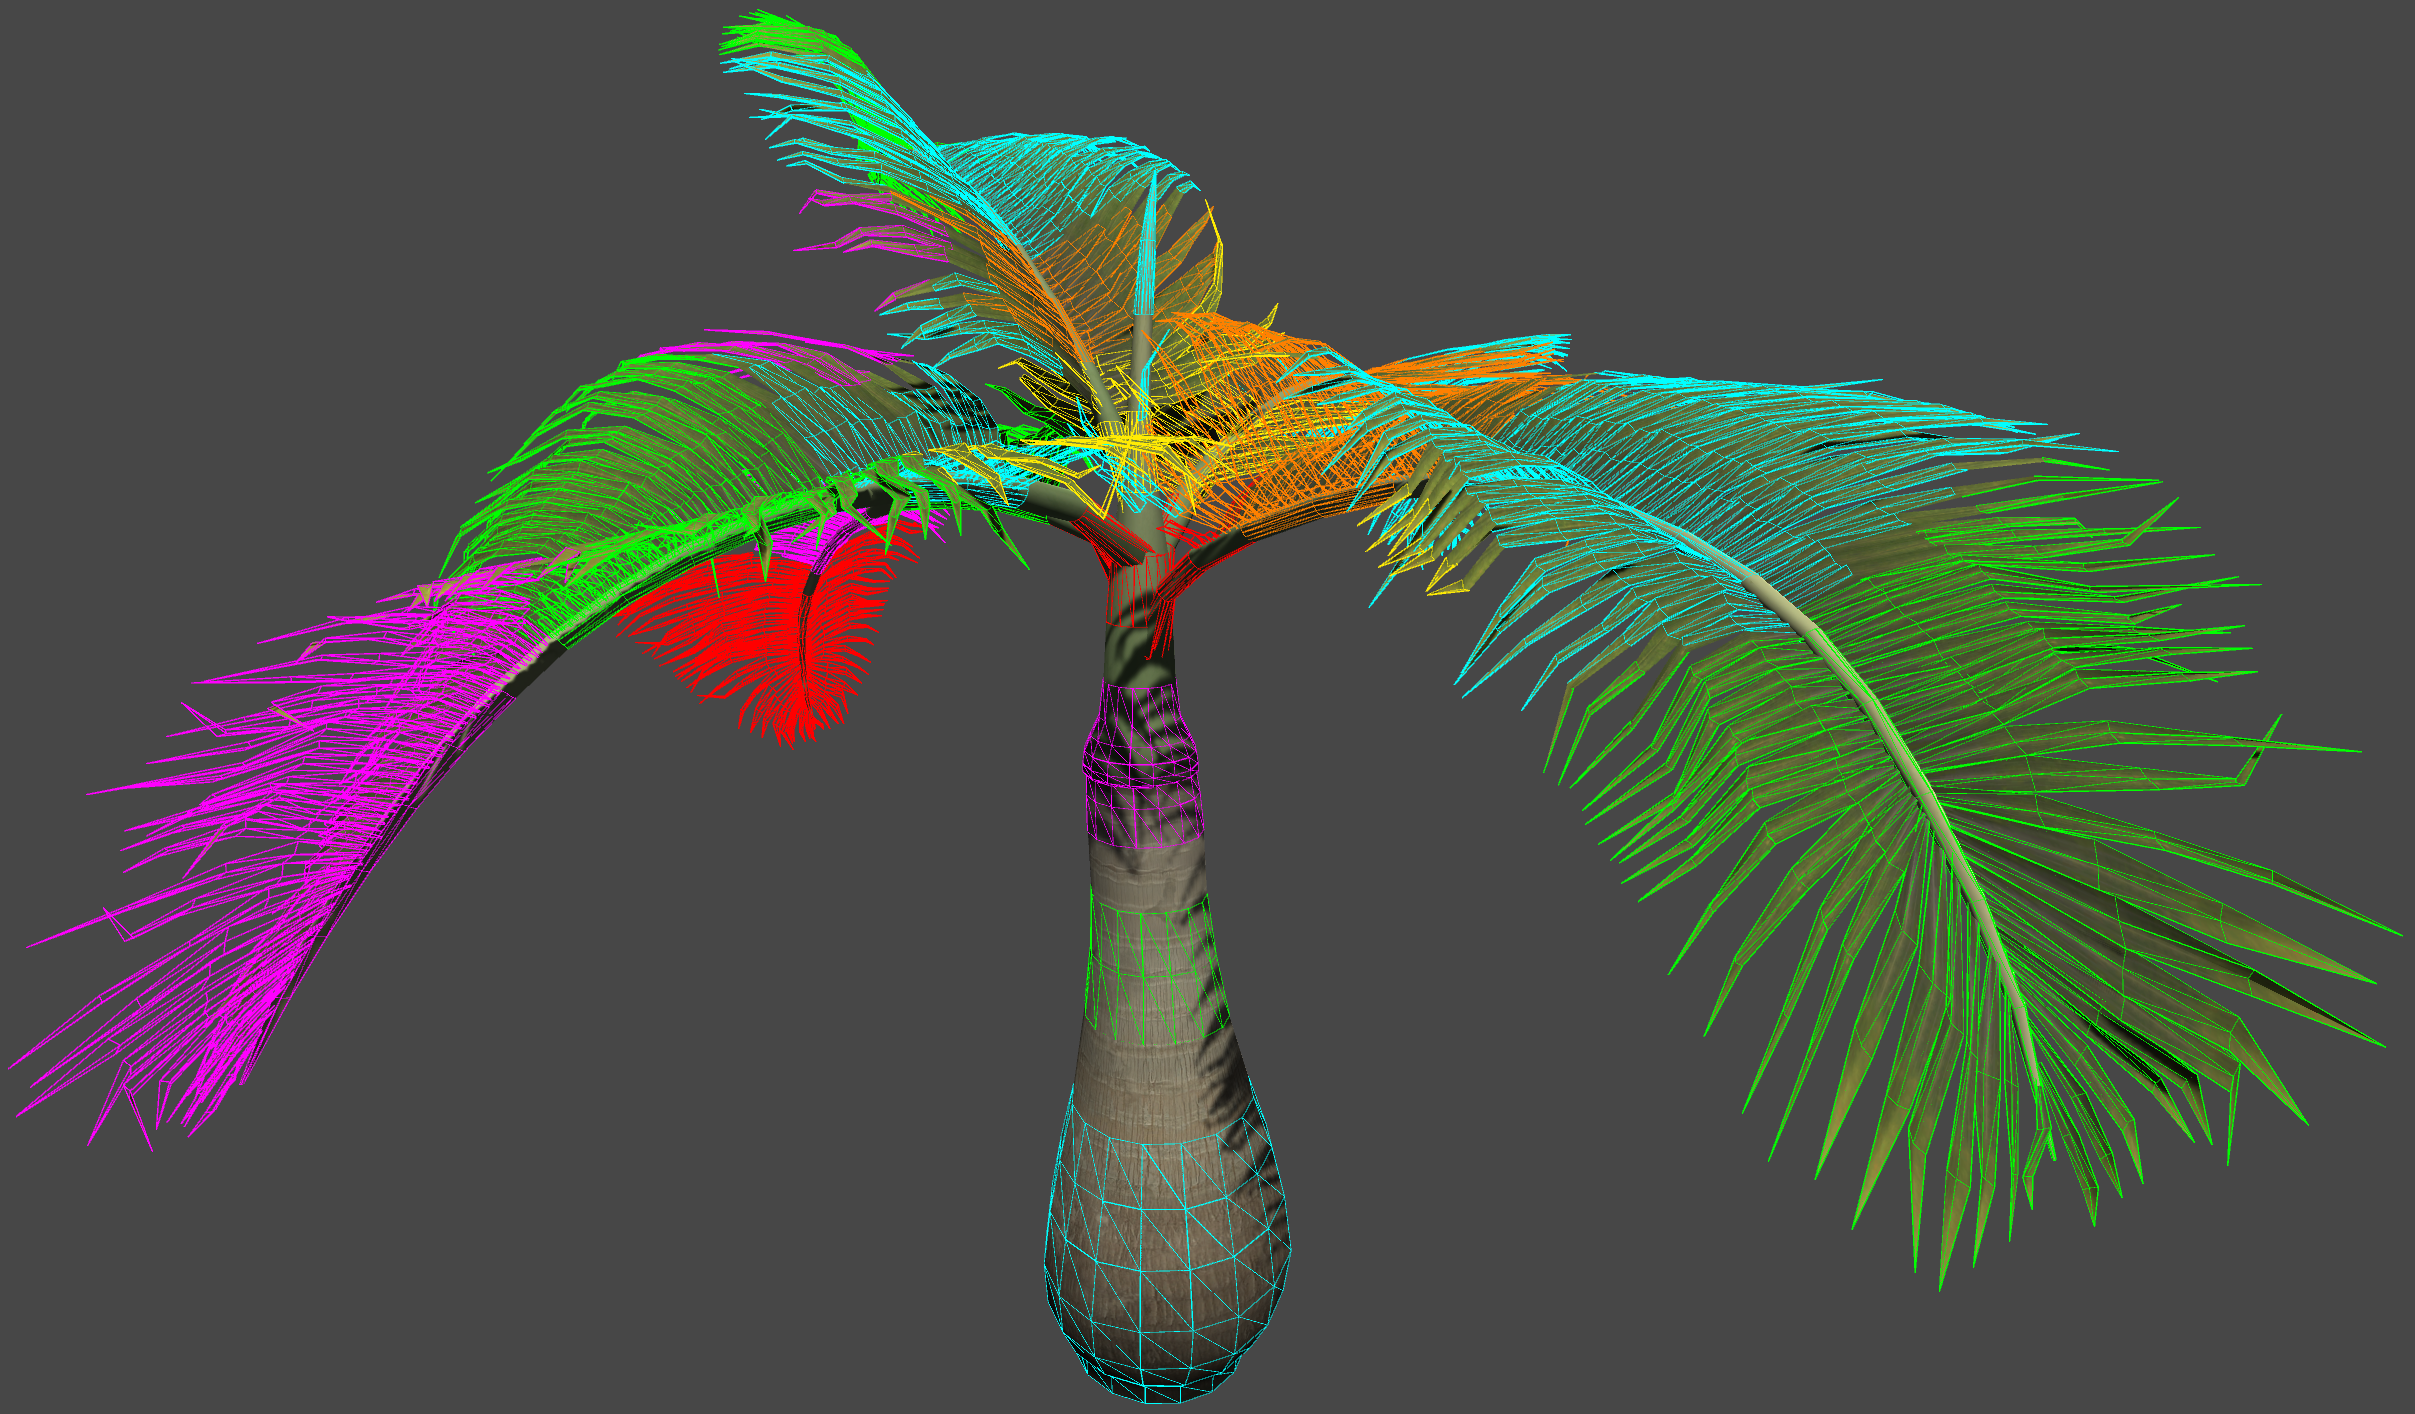
Here's how long it took to skin the models seen in the screenshots. A line of code was executed 5 times (restarting in between) and the average time taken in milliseconds are presented here. The work() method takes roughly twice as long to get done in the Unity Editor.
new MeshSkinner(myModelGO, mySkeletonGO, myNeckBoneReachFloat).work().debug().finish();
[EDITOR] Kneeling man (15.6k vertices): 2022 ms
[EXEx86] Kneeling man (15.6k vertices): 1017 ms
[EDITOR] Doberman dog (10.8k vertices): 1060 ms
[EXEx86] Doberman dog (10.8k vertices): 526 ms
[EDITOR] Man from behind (3.3k vertices): 173 ms
[EXEx86] Man from behind (3.3k vertices): 113 ms
[EDITOR] Palm tree (14.2k vertices): 1040 ms
[EXEx86] Palm tree (14.2k vertices): 508 ms
[EDITOR] Grass plane (0.1k vertices): 54 ms
[EXEx86] Grass plane (0.1k vertices): 47 ms
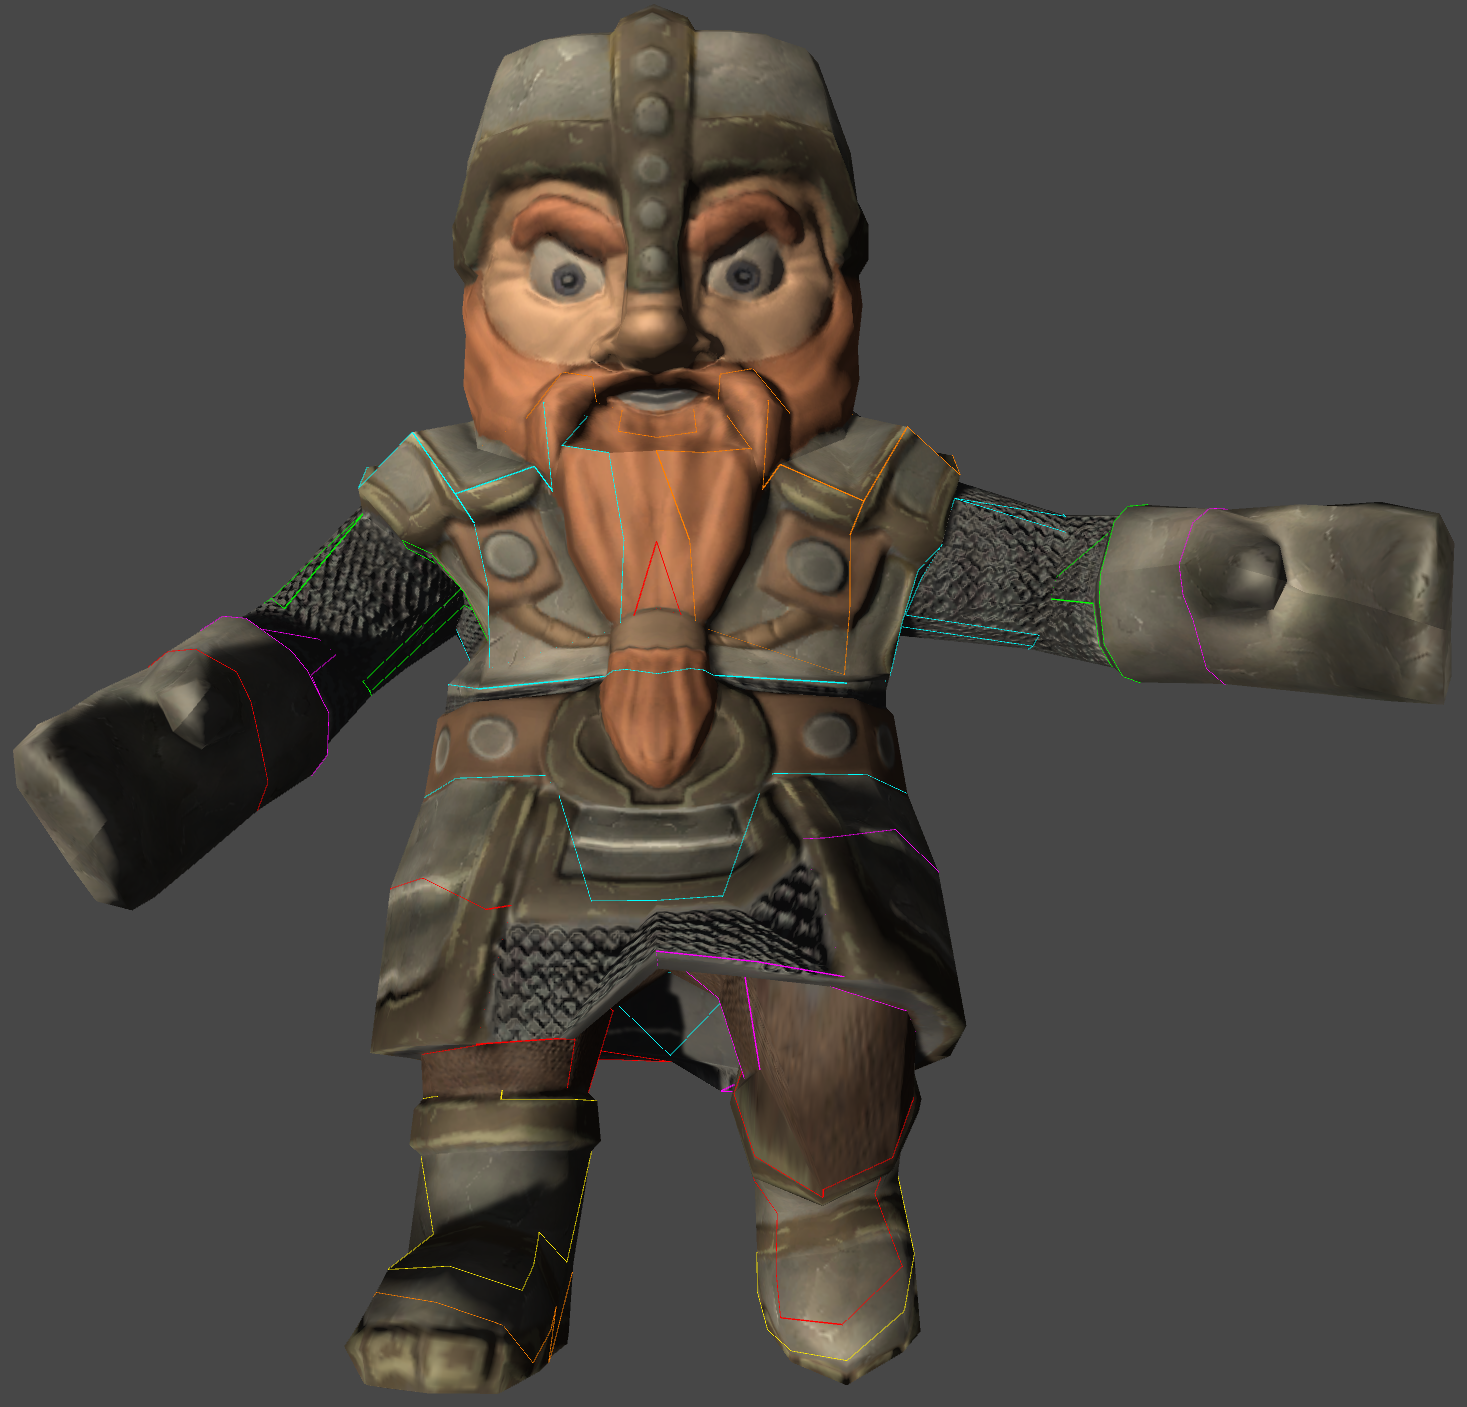
[EDITOR] Happy dwarf (1.2k vertices): 133 ms
[EXEx86] Happy dwarf (1.2k vertices): 96 ms
Hardware (CPU): Intel Core i7-3630QM 2.4-3.4 GHz 6 MB Level3 Cache (sitting in a laptop I bought early 2013)
I'd like to mention that only "kneeling man" has a proper skeleton, the other ones I threw together myself in the Unity Editor just by dragging around empty GameObjects.
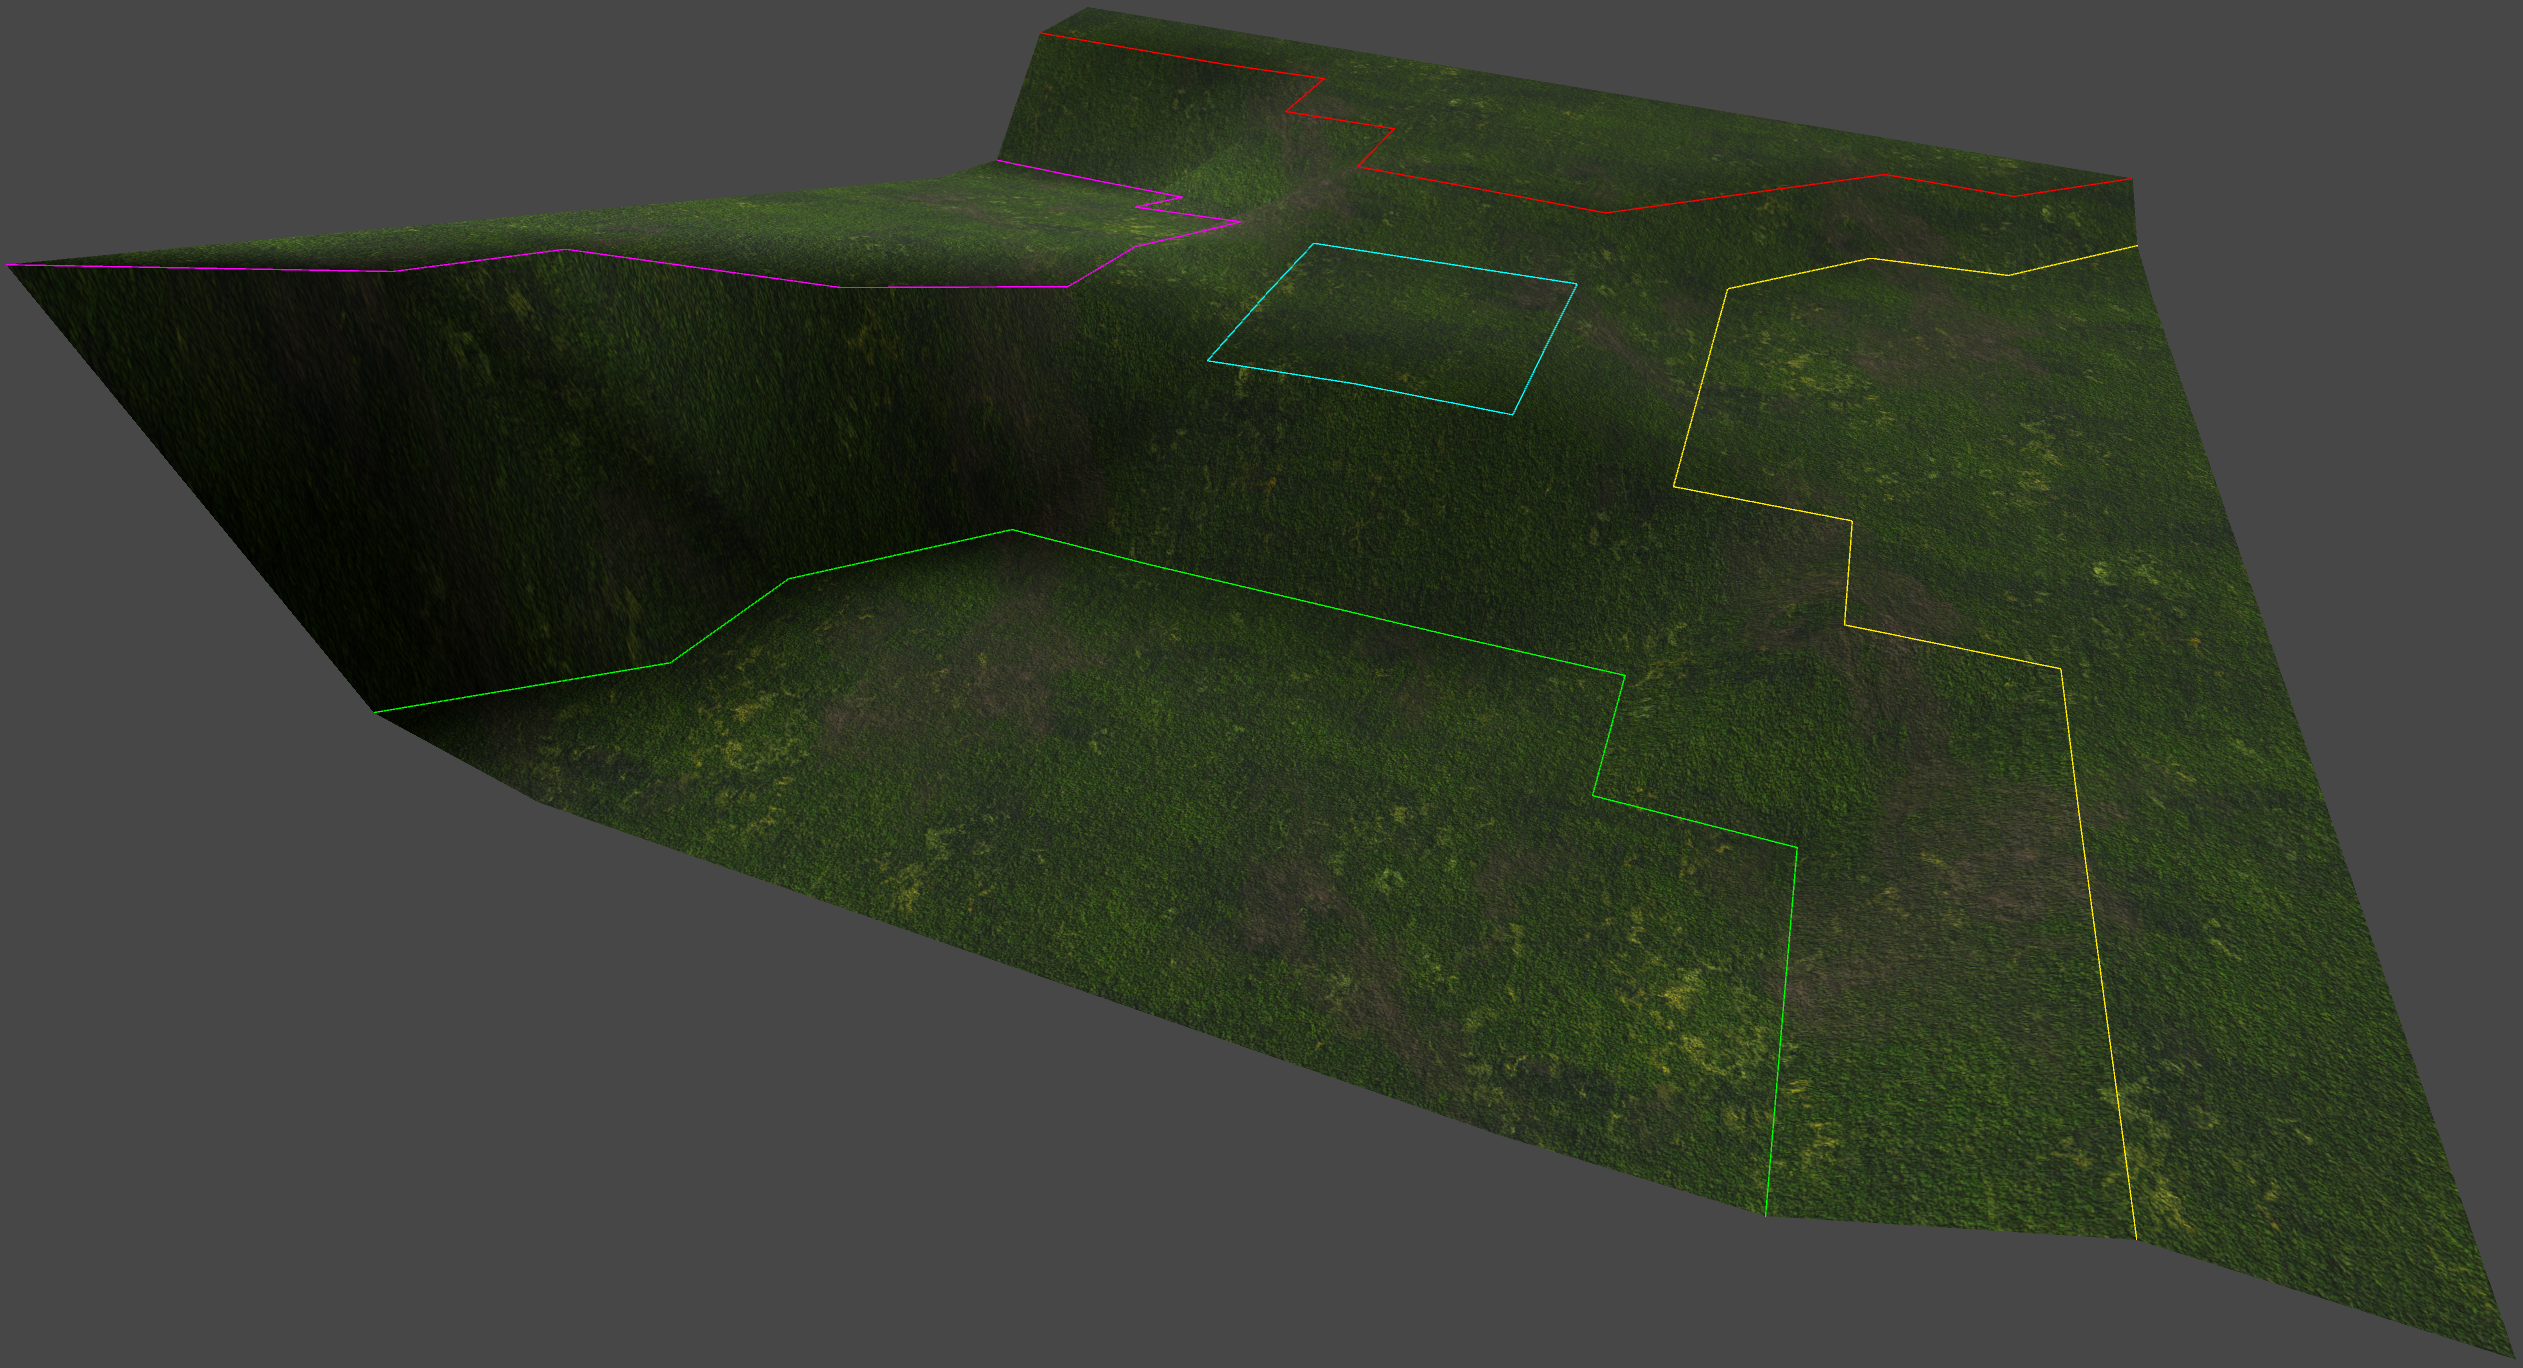
Also, a note on the grass plane: Creating nice looking terrain with MeshSkinner is possible, especially if you paint influences (I didn't do it in this benchmark though). You just need to update the mesh's normals and the GameObject's MeshCollider component after modifying the joints that moves the terrain.
Saving time
Normally once you've called finish() on a MeshSkinner instance you are done with it. Set any stored reference to null so that the garbage collector comes and clean it up.
However, if you are going to skin several meshes using the same skeleton you can save a bit of time by saving the first MeshSkinner instance that has had its work() done and then giving this instance to other MeshSkinner's work() method.
The other instances will then copy all it can use from the first instance, saving precious milliseconds. If you have many models that all use the same walk/fight/whatever animations this can reduce loading times a lot.
The same skeleton = The same skeleton hierarchy/structure, each model still needs to have their own copy/instance of the skeleton. It just looks the same (have the same joints).
What does MeshSkinner like?
MeshSkinner loves low-poly meshes but can handle high-poly ones at the cost of some extra work() time. Denser vertices around the joints help it look more natural when bending a joint. It's also good if the mesh itself tries to rest in as "wide" pose as possible, with much space between limbs.
Look at the red-yellow-orange thumb in the mesh right below the top logo. It is resting pretty close to the side of the hand, it would have been better if it was pointing straight out from the hand instead. More space between the rest of the fingers couldn't have hurt as well, though it works like this too.
Moving details like eyes or the mouth is possible but you probably need to help out by setting some influences manually via the paint methods. Separate meshes (common for eyes) can be processed seperately by using the constructor's string[] array "meshesToProcessExactGONames".
The skeleton can be placed in the middle of the mesh but it's better to place it closer to the side you know it won't rotate towards (if possible - an elbow won't bend backwards but a tentacle can bend in all directions so there you'll want the joint in the middle of the mesh). This is because the MeshSkinner makes use of the joint's position in order to make the mesh a bit more "bendy" for vertices further away from the joint compared to the closest vertex of the same influence (since those verticles move more during rotation).
Two joints are always needed in the skeleton. It is good if joints aren't in the exact same position as another joint, it's however usually not a problem since you can tell work() to disable zero-length bones. If two joints are in the same position (and aren't a parent/child of the other) one of them will cause the other one to not influence much.
Convex meshes and meshes without holes in them are needed if MeshSkinner should reliably detect points that are inside the mesh. It only matters for being able to auto-disable joints outside the mesh though, you can still use MeshSkinner even without that particular feature (bones can always be disabled manually if absolutely needed).
Continuous meshes are required when "spreading heat" across the mesh (spreading influence weight to neighbouring verticles). If there is a gap somewhere heat will not spread across that gap. A "gap" is for example missing mesh triangles between clothing and body parts sticking out (hands, neck, feet). It could be intentional for a desired effect, to for example make the sweater collar not rotate along with the neck, but I'd recommend splitting the meshes into several and skin each part separately in that case (or use the paint methods). MeshSkinner handles gaps just fine though, it just changes how heat spreads.
Modification
The MeshSkinner is designed to be fully automated but doesn't have to be, there are several methods available that lets you change the end result.
| quickFix | The quickFix() method is there to let you change common things: Neck length, head tilt and "bendyness" of spine, upper arm, neck and head. It's usually called from the constructor with your provided neck length and some default values for the rest but you can call it directly for more control if you want to. |
| setRenderBoundsModifier | Change the render bounds if needed. If your mesh will be animated to go outside the original bounds of the resting pose it might be a good idea to increase the size of the bounds so the camera won't miss anything. A method to "square-ify" bounds also exists, as well as a shortcut to do that in the constructor. |
| paintWeightGO | For absolute control you can paint weights directly! Several methods are available: give a GameObject that is checked for BoxColliders/SphereColliders or define the Box/Sphere directly. You can even set influences for individual vertices if you want to. |
| setJointBendyness | The "bendyness" is basically how far influences will spread into other influences, the further they spread the more the mesh will bend like rubber instead of bend like a joint. You probably want a tentacle to have more "bendyness" than an elbow on a human. |
| setRelationshipHeat | Allows you to set exactly how far influences should spread, in world space Unity Units (in setJointBendyness() a percentage is given and the spread distance is then calculated depending on available space). Calls to setRelationshipHeat() will override anything affected by calls to setJointBendyness(). |
| tiltJointBackForth | Joints are given imaginary "joint planes", which basically are rotations determining if a vertex should be influenced by itself, its parent or its child. You can modify these planes by tilting them (three tilt/spin methods are available for all directions) or by setting the rotation directly via setJointForward(). |
| setBoneReach | The default bone reach is 100%, all of the space between its start joint and end joint belongs to the start joint. Sometimes you don't want that however, most notably for the neck bone where the end joint usually is placed too far into the head compared to where the head's jaw is. Then it's useful to be able to pretend the bone is shorter than it is (can be made longer as well). |
| setBoneAsDisabled | If you have a bone to pick with whoever made the skeleton it's easier to just pretend the bone is not there. Disabled bones will not influence vertices or restrict other bones. The work() has a couple of useful arguments that will allow you to auto-disable bones found to be outside the mesh. |
These methods needs to be called before work(). Most should be callable outside Unity's main thread.
Debug
The MeshSkinner.DebugWeights component (a MonoBehaviour) provides you with a way to see how a mesh has been skinned, call debug() to add it to your model and you will be able to see the weights of all SkinnedMeshRenderer components (works outside the Unity Editor too). For clarity only the most influential transform for each vertex will be visualized (MeshSkinner allows up to four influences per vertex, which is the max Unity supports).
You can visualize the mesh triangles and/or every point and draw lines between the points and the transform that influence them the most. These are redrawn every frame and move if the mesh/skeleton moves. You can isolate a certain influence and only draw that one if you like to. If debug() is called after work() you can visualize the "joint planes" as well, these represent the rotation of the the joints during skinning and affects which vertex gets which influence.
The DebugWeights component can be used to visualize any SkinnedMeshRenderer component, even those not created by MeshSkinner. There's a static MeshSkinner.debugWeights() helper method for that. You can modify the values of the DebugWeights component in the Unity Editor after it has been added.
Try Before Buy
There is a free demo available so you can see for yourself what this tool can do for you! See below for a download.
Some points about the limitations of the demo:
- Requires an empty text file to be placed into the Resources folder of your Unity project. Simply call the MeshSkinner constructor for details. It needs to be renamed every once in a while. You'll get told by the MeshSkinner constructor when the time comes (prints a message in the console). The text file can be seen as a kind of "demo key".
- All features are included in the demo version. You'll be able to see exactly what this tool can do for you without having to invest any money!
You can test the demo for as long as you want to, just don't release anything that anyone outside of the development team can access. As you probably realize the first demo limitation is to prevent games from being released with a demo version of MeshSkinner, since the demo DLL won't work for everybody and will stop working for all eventually.
Note: The demo isn't a showcase, you need to have a mesh and skeleton to test with yourself.
Installation
Extract the ZIP archive in your Unity project's "Assets" folder.
This places a .dll file (plus two other files) in Assets/Plugins/Winterdust, now ready to be used in your game.
Using a .dll file in Unity doesn't make your game Windows-only, you can still build for any platform (Windows/Linux/OSX).
Note: There is a MESHSKINNER_README.TXT in the .zip file as well. After you've read it you can delete it if you want to.
Documentation
Everything that is accessible (public fields/methods/etc) have detailed XMLDOC describing what they do and how to use them.
They should show up as normal in your code editor as long as the included XML file is placed next to the DLL file.
Licence Agreement
- This tool is per-seat. If multiple people will access the MeshSkinner class in your development team please purchase the tool multiple times.
Final Words
Try skinning a mesh during runtime today! You can use this on any mesh, humanoid or not.
Why not use it to move a door? Make trees swaying in the wind? Tentacles wobbling menacingly? You name it; as long as you have a mesh and a skeleton the MeshSkinner can handle the challenge! Btw, the skeleton can be put together inside the Unity Editor if you want to do it that way. It is after all just a bunch of empty GameObjects put together.
Looking for a way to import a skeleton and animation? I've made the perfect tool for that exact purpose:
BvhImporterExporter - Import a .bvh file, make a skeletonGO, then use it with the MeshSkinner and BAM: you've got a dancing character!
You don't need to create an account here on itch.io in order to buy this tool.
Actual payment is done on PayPal's site (credit card accepted - no account needed).
Note: Some additional info may be required for tax purposes during purchase, if so you will get a "Billing address" message
before being taken to PayPal ("2015 VAT MOSS regulations for EU"). Simply fill out the form and press "continue payment".
The info is used to calculate what VAT percentage to add on top of the price (if you live in USA it will always be 0%).
Psst! Check out JezzBall Classic while you're here! 
Purchase
In order to download this tool you must purchase it at or above the minimum price of $45 USD. You will get access to the following files:
Download demo